A couple months ago one of my friends got a 3d printer (specifically, this one: Makerbot Replicator 2). Practically the first thing he asked at lunch after he got it was what did people want to print. Apparently a lot of people think a 3d printer would be neat to have, but very few people actually have any idea what they’d do with one. I, on the other hand, have wanted one and been following the RepRap project for years so I had a list.
Top of that list at the time was a bearing holder for my vacuum. Similar to my roomba (which I haven’t used since I got my house), my vacuum collects cat hair on the axle for the beater brush, which eventually builds up to the point that the friction melts the bearing holder and the brush starts wobbling. I’ve replaced the part before, but ordering from the company that makes the vacuum the smallest part I can buy is the entire brush assembly. I’ve done that before and it’s not too expensive, but it’s far more than I need.
Seeing as nobody I know has a 3d scanner I had to model the part myself, which is why it took me until last weekend to finally send Calvin the file to have printed. I modeled the part in Wings 3d, which took me 4+ hours to get comfortable with the program (I’ve used it before so I knew what it was capable of, just needed to figure out the best way to do things), then about an hour to get the part completely modeled and another hour to find and clean up geometry that looked right but was causing it to add extra bits when I exported to the printing program.
Here’s the end result, printed in white:
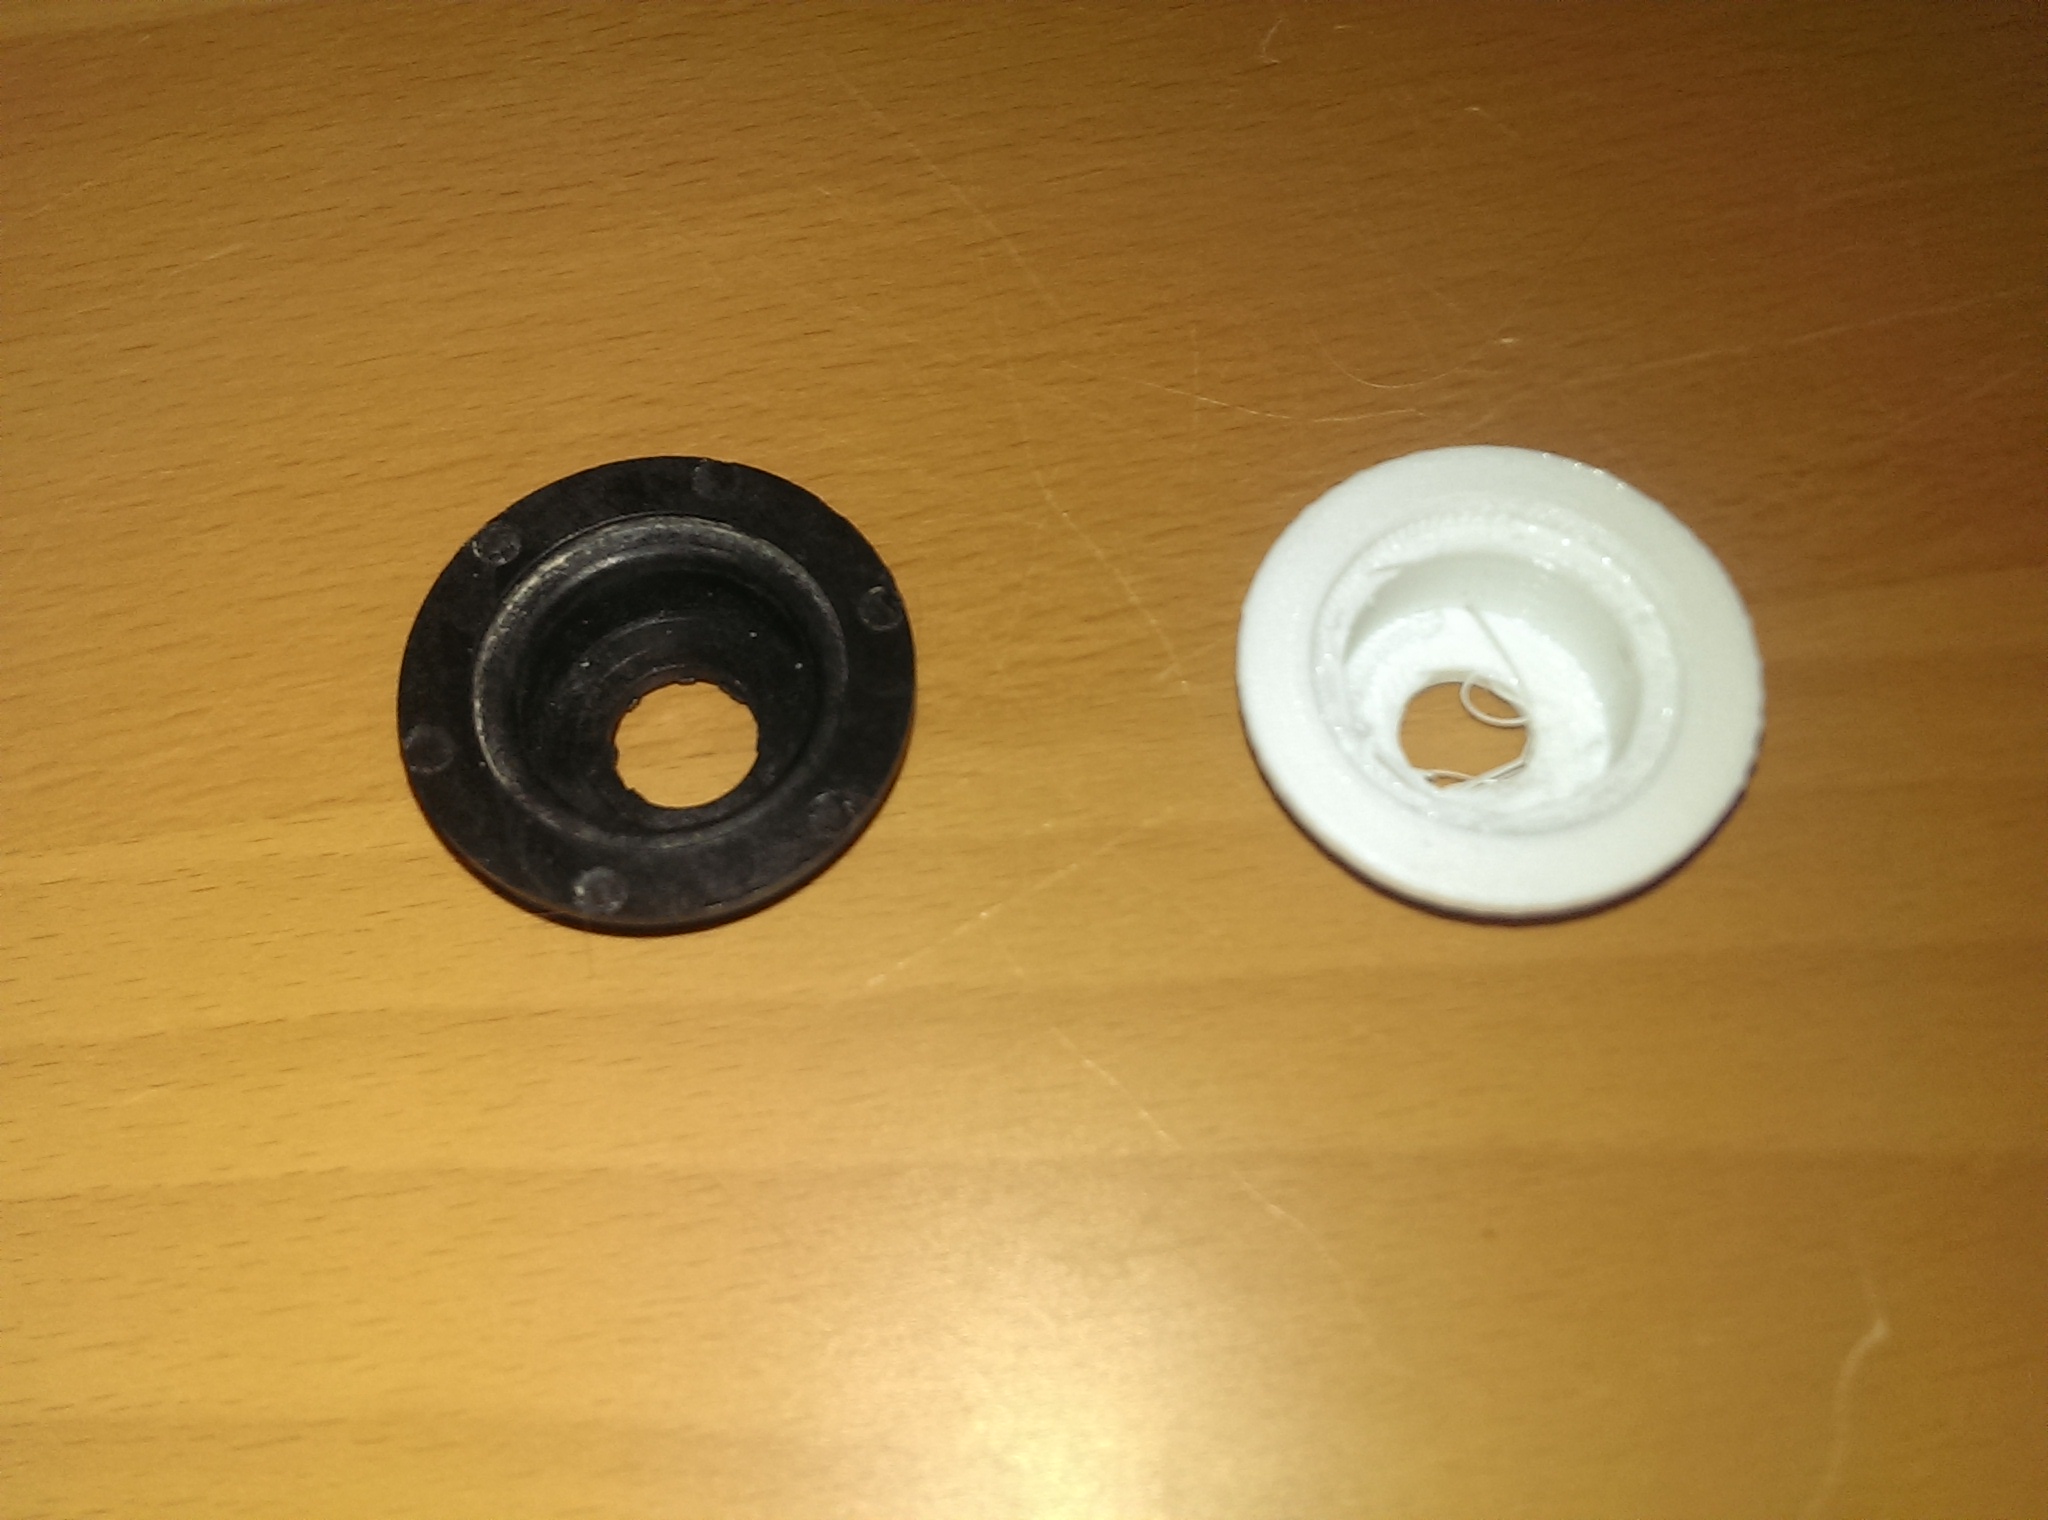
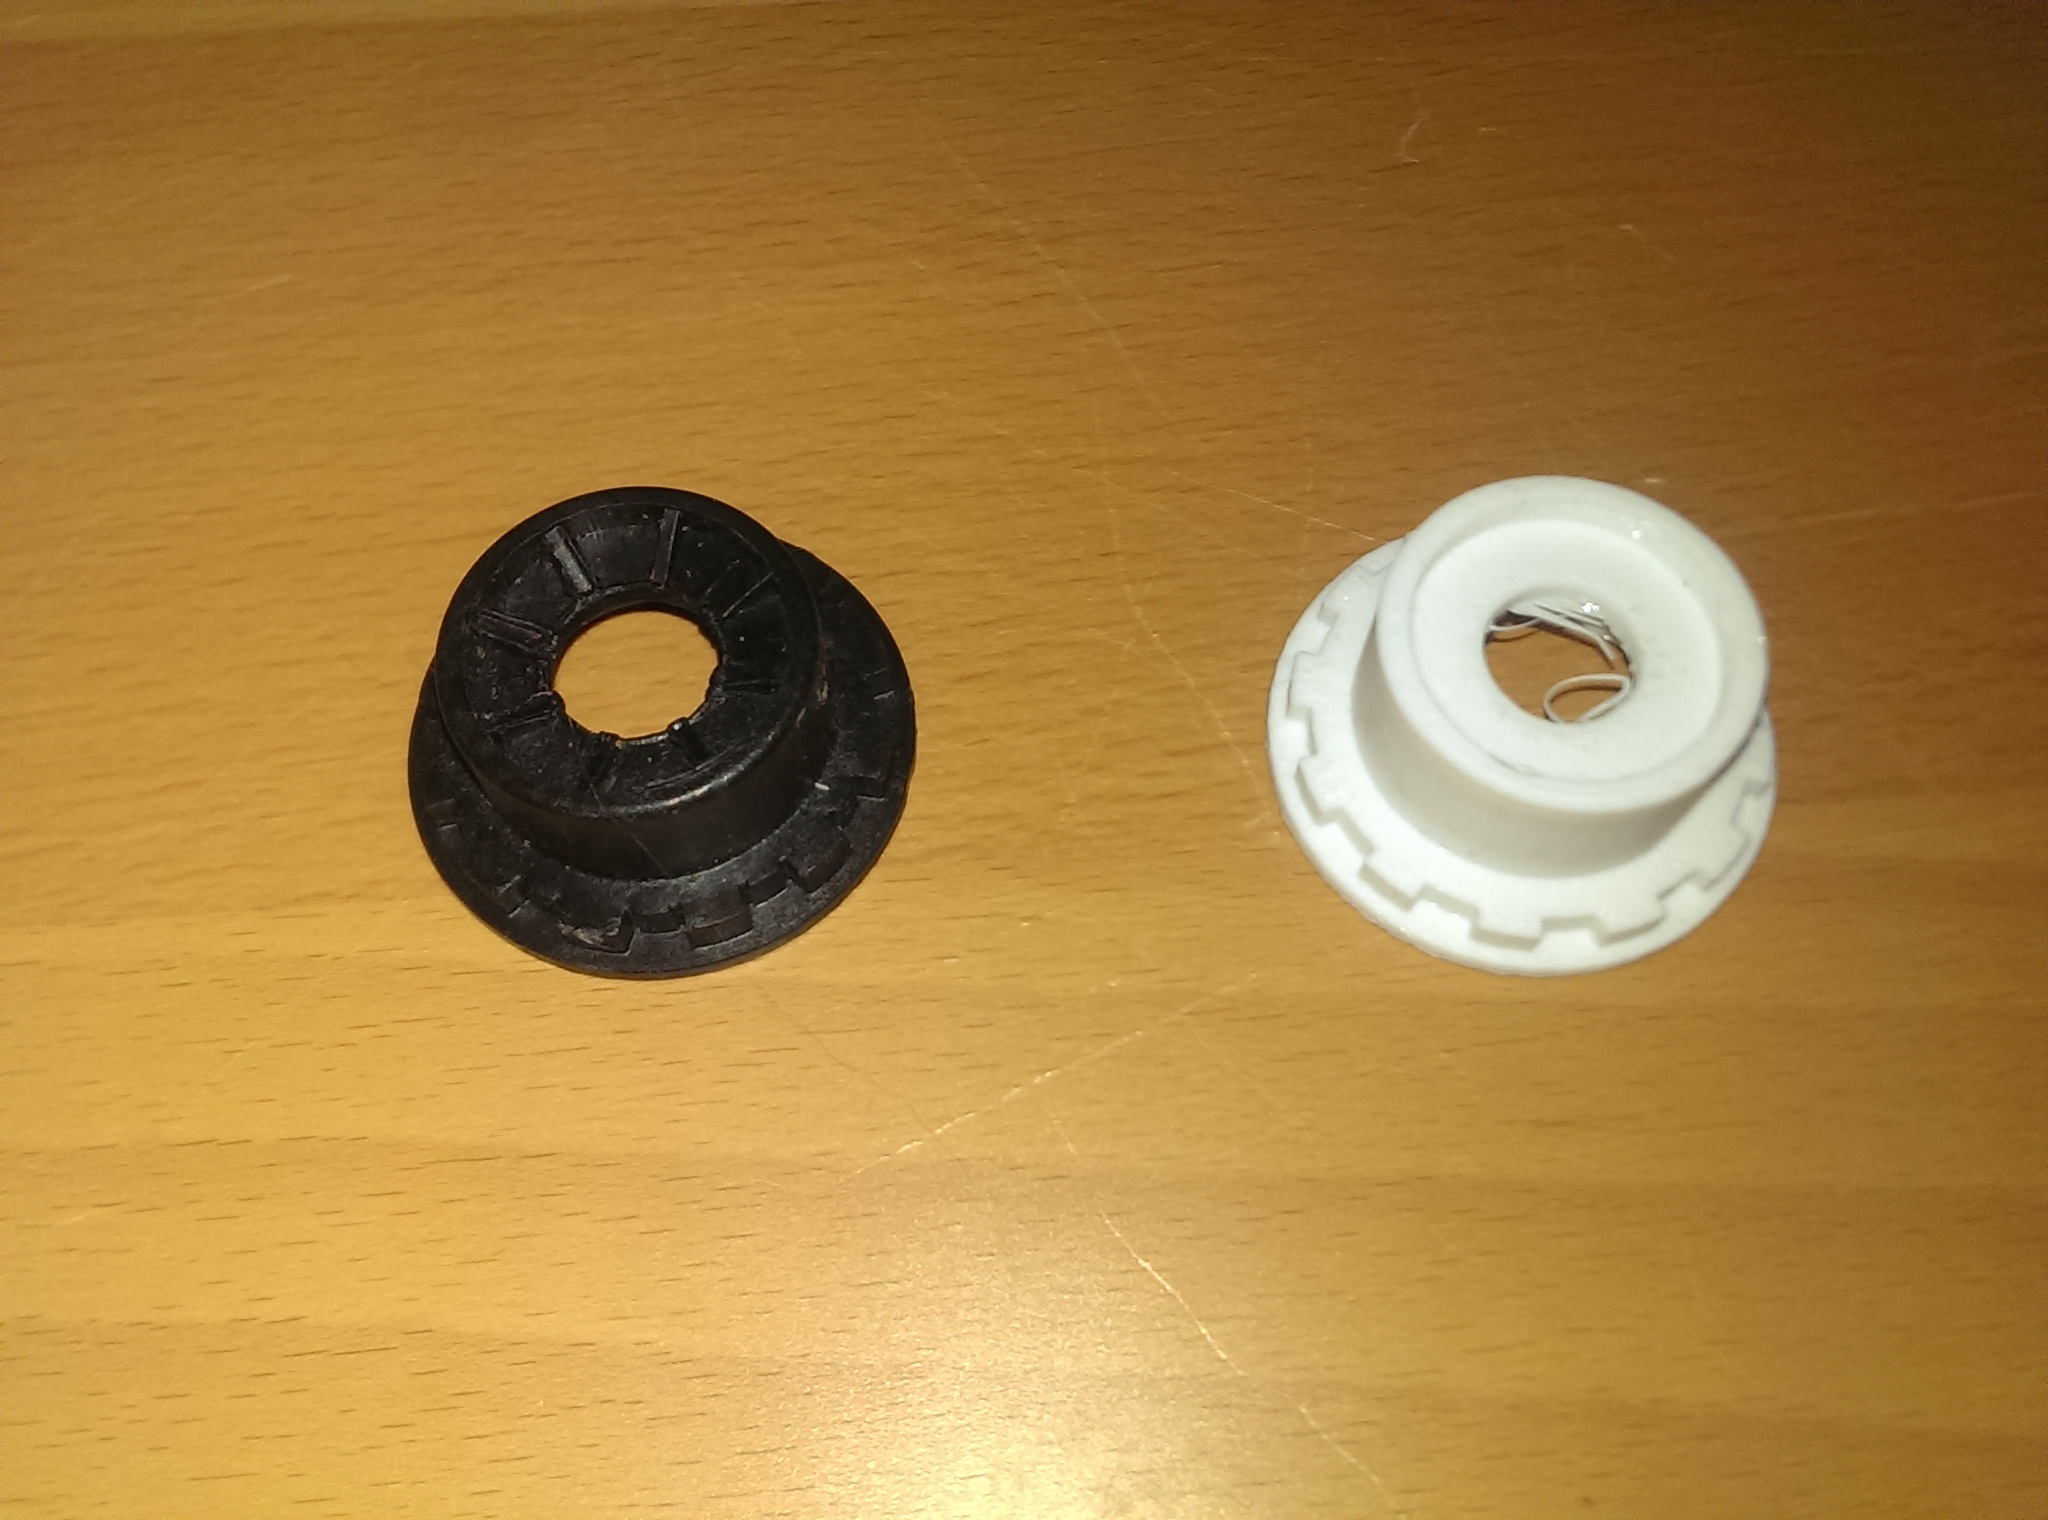
The outer surface came out almost perfect. It’s a bit more snug than the old one, but not particularly hard to pull back out of the brush. The inner surface needed some cleanup (overhangs aren’t exactly a strong point of additive 3d printers), but I got the bearing inserted. I immediately put it in the vacuum to try it out, turned the vacuum on, and it started smoking. Turned out I hadn’t gotten the bearing in far enough so the axle cap was pressed against it and wouldn’t turn, so it was burning the belt. I guess I should have sanded the inner surface out a bit more before inserting the bearing because I couldn’t get it back out, but I took a hammer to it and beat it down the rest of the way. After that the vacuum works just as well as always with a new bearing holder.
I honestly don’t expect the 3d printed part to hold up as well as the original, largely because the plastic it was printed with (PLA) melts at a lower temperature than ABS so it won’t take as much cat hair buildup to melt it. On the other hand, even using makerware-brand filament in the printer (3rd party filament tends to be cheaper) and printing with a raft (uses extra plastic to put down a base layer to print on) the part costs all of 44 cents in materials to print.
Wings3d is great for general modeling, but it’s not really designed for precise engineering designs. OpenSCAD is, so I’ve since rebuilt the design in an OpenSCAD script. That makes it really easy to change sizes (because the sizes are all in constants set in the script as opposed to being carefully positioned edges) and allowed me to improve how the bearing slides in (increased the size, added rails that stick out to hold it in the center but will be easy to sand down if I still didn’t make it big enough). I was also able to easily angle the inner edges to make it more suitable for 3d printing. I’ll probably have the new version printed soon to try it out, but I’m not anticipating needing to replace the part for several months at least.