I started a different post last weekend, but all I ever did was get the pictures together and it’ll take a bit more work to finish up the other content I was planning for that post, so here’s a completely different topic.
One of the nice things about having a 3d printer is the ability to design something and have a physical copy of it a short time later (as short as minutes to hours, depending on size). This allows for rapid iteration and fine tuning of designs, and I believe is typically what 3d printers are used for commercially (excluding companies that print as a service, like Shapeways). Here’s the last two weeks worth of work on one of my projects:
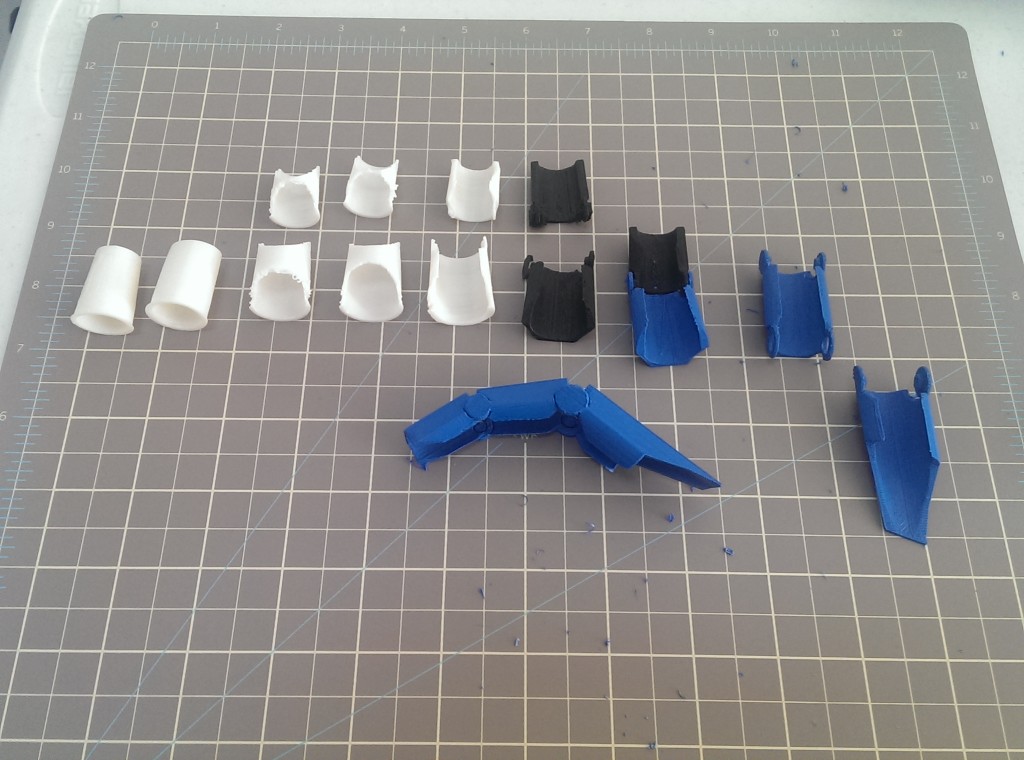
A 3d printed glove was the original goal, but it quickly became obvious that I was basically designing armor so now that’s the plan.
Version 1 (white ABS)
The white pieces make up the first set of iterations. They were all printed in a weekend, and the takeaway from that work was the inner shape including cutouts on the bottom of the finger to allow the armor to be tightly fitted but still let the finger flex. I ended that set by putting a hinge between the two joint segments that I’d printed, at which point I realized that my finger was just crooked enough that a straight hinge won’t work if I’m trying to have it fit snugly. Also, printing on end not only won’t work for putting hinges on both ends, but it puts the strength in the wrong direction for making a strong hinge.
The main advantages of printing on end was that I could minimize the plastic used in each piece by printing exactly the shape of my finger, and the prints were fast: if the printer was warmed up I could go from exporting the design to holding the printed piece in about ten minutes (though I was over-eager once and tried to remove it from the printer while it was still hot enough to be soft; completely bent that piece).
Version 2 (black PLA, blue ABS)
The blue and black pieces were printed over the span of about two weeks after the initial set. I forget why I initially tried printing in PLA, but it was too stiff to get the hinges to snap together without breaking the tabs off.
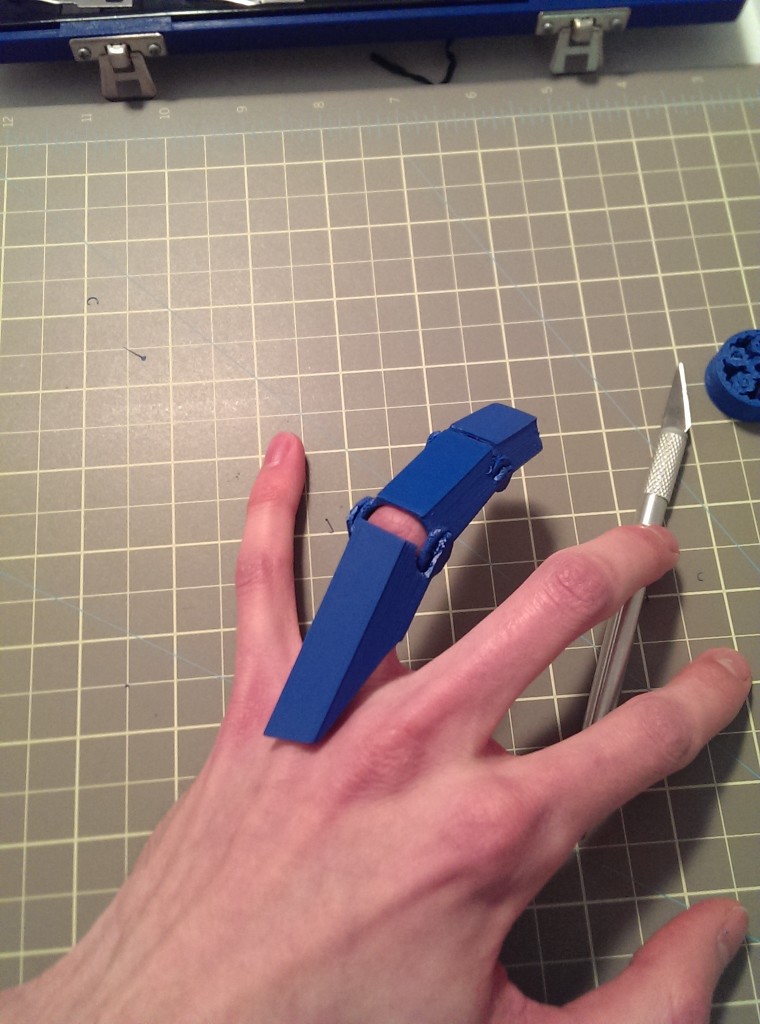
This set was nearly a complete rework of the original script to remove complexity. On the first set I’d just kept adding more and more operations to refine the shape to the point where it wouldn’t render quickly in OpenSCAD, so I basically redesigned the hinge to consist of two pieces per side and modeled the new finger-top geometry as a single piece.
The reworked design is printed with the top of the finger flat on the bed, and it’s more angular instead of rounded to match the finger. That makes it printable, but the hinges needed support (that kept breaking off, which is why they look kind of messy), it took more plastic per print, and the print times went up to I think around fifteen to twenty minutes per segment. I also tried out putting the hinge at an angle (the connected black and blue pair), and while that fundamentally worked it didn’t match my finger at all.
The resulting piece fits quite well, though it doesn’t breathe at all so it’s not great for wearing for all that long. It also has a habit of pinching my knuckle when I straighten my finger and the hinges can pinch when I flex my finger too. On the other hand, it flexes with my finger so well that if it were a little narrower it would be easy to forget I’m wearing it. The end is cut a little bit short so it doesn’t impede my fingertip and I can actually type while wearing it.
Version 3
Version 3 is going to again be a nearly fresh restart, largely to refactor the math to make the different parts share functions instead of being slightly modified copies of each other. The finger base piece turned out quite nicely in the end, but I’d rather not go through the hour+ I spent making the top actually flat again the next time I modify it.
I also have ideas on how to streamline the hinges so they’re more firmly attached and might not need supports. So far all my supports have been part of the model. I’ve tried letting Slic3r generate the supports for me but I’m printing directly on glass and the automatic support bases are so small that they get either knocked over or picked up and stuck on the side somewhere else. My own supports have worked about half the time, which is much better but not exactly a great success rate.
